This guide covers everything you need to know about mounting solar panels, from choosing the right location to mounting solar panel under roof rack installation techniques and maintenance tips.
As solar energy becomes increasingly popular, more homeowners and businesses are investing in solar panels to power their properties. Mounting solar panels properly is essential to ensure optimal performance and long-term durability.
This guide covers everything you need to know about mounting solar panels, from choosing the right location to mounting solar panel under roof rack installation techniques and maintenance tips.
Why Proper Mounting is Crucial
Mounting solar panels is more than just attaching them to your roof or ground. Proper installation ensures:
- Maximum Energy Efficiency: Panels need to be positioned at the correct angle and direction to capture the most sunlight.
- Longevity: A well-mounted panel can last 25 years or more, providing a long-term return on investment.
- Safety: Poorly mounted panels may come loose or suffer damage during extreme weather conditions.
By following the correct mounting process, you can maximise the benefits of your solar energy system.
Choosing the Right Location
Before you begin the installation process, selecting the best location for your solar panels is key. There are two main options: roof-mounted or ground-mounted panels.
Roof-Mounted Solar Panels
This is the most common method for residential installations. Roof-mounted systems take advantage of existing space and are usually cheaper since they don’t require additional structures. However, not every roof is suitable. Consider the following factors:
- Roof Orientation and Tilt: South-facing roofs (in the Northern Hemisphere) are ideal. A tilt angle of 15° to 40° typically offers the best solar exposure.
- Roof Condition: Make sure your roof is in good shape before installing panels. An old or damaged roof may need repairs to support the system.
- Shading: Avoid areas with shade from trees, chimneys, or nearby buildings. Even partial shading can reduce energy output.
Ground-Mounted Solar Panels
Ground-mounted systems are ideal for properties with plenty of open space. They offer flexibility in positioning and are easier to maintain. Ground mounts are also adjustable, allowing you to change the tilt to suit seasonal variations. However, they require more space and often involve higher installation costs.
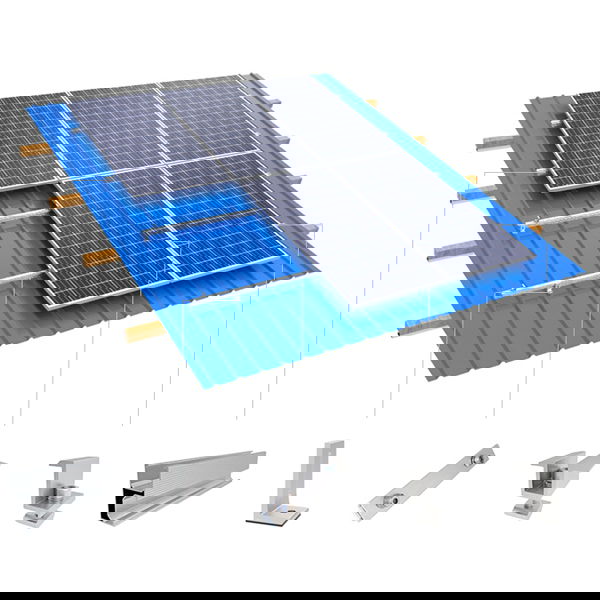
Types of Mounting Systems
There are various mounting solar panel under roof rack systems available, depending on your roof type and space:
Flush Mounts
Flush mounts are used for installing panels on sloped roofs. The panels lie flat against the roof, with brackets securing them. This is a simple and cost-effective option but offers limited flexibility in angle adjustment.
Tilt Mounts
Tilt mounts allow panels to be positioned at an angle on flat roofs or ground-mounted systems. Adjustable tilt mounts help optimise energy production by adapting to different seasons when the sun is higher or lower in the sky.
Pole Mounts
A pole mount system involves mounting panels on a single or multiple poles embedded in the ground. Pole mounts provide greater flexibility in angling and orientation. They are ideal for off-grid systems or where roof space is unavailable.
Tracking Mounts
Tracking systems follow the sun’s movement across the sky, ensuring maximum exposure throughout the day. These systems can increase energy production by up to 25-35%, but they are more expensive and require more maintenance due to moving parts.
Tools and Materials for Installation
Before starting the installation, gather the following essential tools and materials:
- Mounting brackets: These secure the panels to the roof or ground structure.
- Roof hooks: Used for attaching brackets to roof rafters.
- Rails: Solar panels are mounted on rails for extra support.
- Bolts and screws: To secure the entire structure.
- Drill: For creating holes in the roof or ground structure.
- Level and measuring tape: Ensures the system is aligned properly.
- Step-by-Step Guide to Mounting Solar Panels
Step 1: Design and Layout
Begin by planning the layout of your solar panel array. Measure the area and consider factors like shading and accessibility. Use software tools to estimate energy output based on your location and the number of panels.
Step 2: Install the Mounting System
- For roof-mounted systems, locate the rafters beneath the roofing material and attach roof hooks securely. Install the mounting brackets on the hooks and ensure they’re aligned.
- For ground-mounted systems, you’ll need to dig holes for the foundation and set poles. The poles are then secured with concrete.
Step 3: Attach the Rails
Once the brackets are in place, attach the rails to the brackets. Rails provide a stable platform for the solar panels to rest on. Make sure the rails are level and securely fastened.
Step 4: Mount the Solar Panels
Carefully lift the panels and place them on the rails. Secure the panels using bolts and screws, ensuring they’re tightly fastened but not over-tightened, as this could cause damage.
Step 5: Connect the Wiring
After the panels are in place, the wiring needs to be connected to the inverter and power supply. Use proper connectors and follow local electrical codes to ensure safety.
Step 6: Final Inspection
Once the panels are mounted and connected, perform a final inspection. Check that all bolts are tight, the wiring is secure, and there’s no shading on the panels.
Maintenance Tips for Mounted Solar Panels
Solar panels generally require minimal maintenance, but a few simple practices can help them function optimally:
- Regular Cleaning: Dust, debris, and bird droppings can block sunlight, reducing efficiency. Clean your panels once or twice a year, especially after heavy weather.
- Check for Damage: Inspect the panels, wiring, and mounts periodically for any signs of damage, corrosion, or loose connections.
- Monitor Energy Output: Use your solar monitoring system to track energy production. A significant drop in output could signal an issue with the panels or wiring.
Final Words
Mounting solar panels is a vital step in transitioning to clean, renewable energy. By choosing the right location, and type of mounting system, and following a careful installation process, you can ensure your solar panels perform optimally for decades.
Proper mounting solar panel under roof rack maintenance will keep your system running efficiently, providing a reliable source of power for your home or business. Whether you opt for a roof-mounted system or ground-mounted panels, investing time in the correct installation is well worth the effort.
Source From : The Ultimate Guide to Mounting Solar Panels